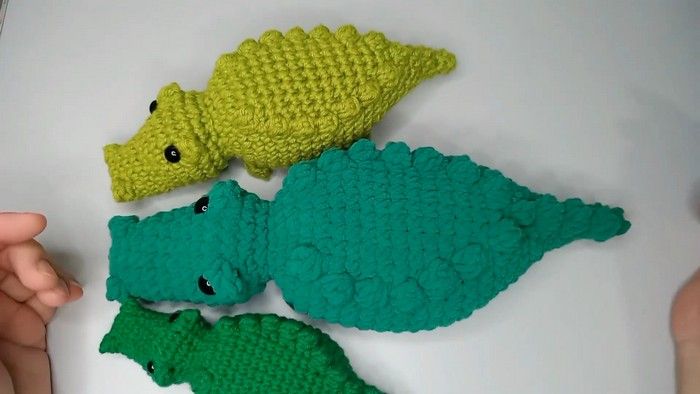
Crochet Alligator Amigurumi
Crocheting your very own alligator amigurumi can be a delightful and creative project to dive into! With its adorable design and charming details, this crocheted toy is sure to bring a smile to anyone's face. From selecting the perfect yarn colors to crafting each crocodile scale with care, the process of making this cute alligator can be both relaxing and rewarding. Whether you're a crochet enthusiast looking for a new challenge or a beginner eager to try something fun, creating a crochet alligator amigurumi is a fantastic way to unleash your crafting talents and spread some handmade happiness!
Required Materials
- Yarn: Choose a compatible yarn for your crochet project. Thicker yarn will result in a larger alligator.
- Crochet Hook
- Safety Eyes: 12mm eyes are recommended.
- Tapestry Needle: For finishing the project.
- Stitch Marker: To keep track of rounds.
- Stuffing: For filling the alligator.
Step-by-Step Instructions
Starting the Crochet
Foundation Chain: Chain five times.
Round 1:
Skip the first chain and make three single crochets.
Increase in the last chain by doing two single crochets together.
Repeat the pattern (three single crochets and an increase) once more, ending with ten stitches total.

Building the Body
Round 2:
Begin with one single crochet.
Add a bubble stitch with three loops in the same stitch.
Continue with three single crochets.
Another bubble stitch in the next stitch.
One single crochet followed by five single crochets to round out with 12 stitches.
Round 3:
Crochet twelve single stitches.
Maintain continuous rounds by increasing and varying the pattern slightly.
Middle Rounds (4-28)
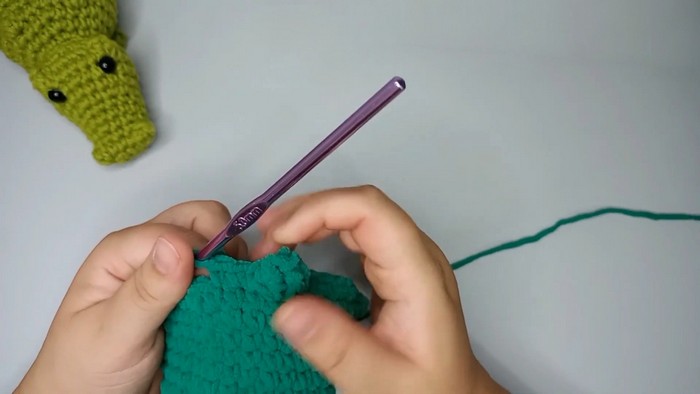
The pattern will include various combinations of single crochets, increases, bobble and popcorn stitches. These combinations will shape the body and define features.
Continue building the piece up to round 28, varying the stitches to create texture and shape. This includes stitching towards the mouth area and the body’s main mass.
Finalizing the Shape
Round 29 & Onward:
Begin rounds with decrease patterns tapering down from round 30 onwards.
Insert safety eyes at the specified positions as you close off the body from previous rounds.
Conclusion:
Once rounds are complete, use a tapestry needle to close the final opening.
Carefully weave in the ends for a clean finish.