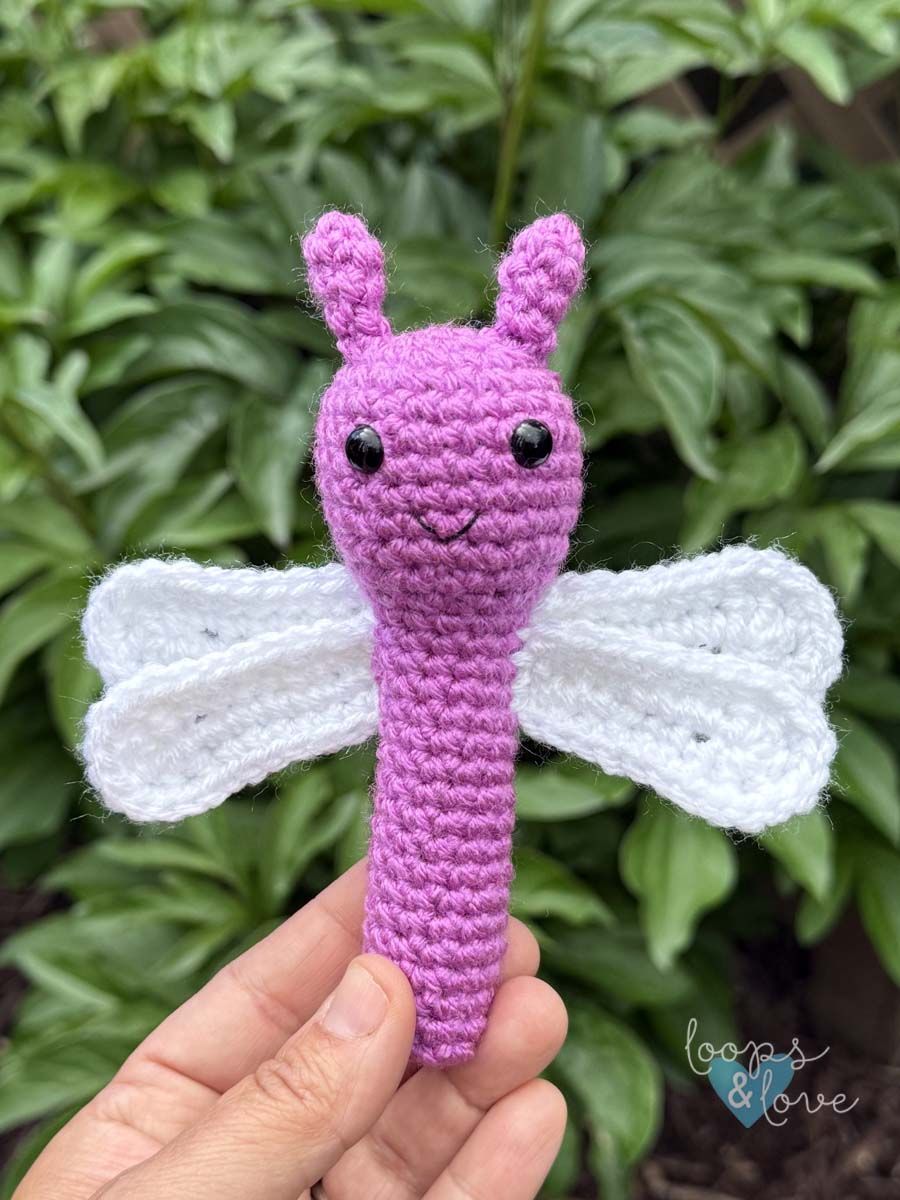
Crochet Dragonfly Amigurumi
Crochet Dragonfly Amigurumi is a delightful and whimsical craft project that is sure to bring a smile to your face. These charming little creatures can be customized in all sorts of colors and sizes, making them a fun and creative way to add a touch of magic to your home decor or a unique gift for a special someone. With their intricate details and intricate designs, crocheting dragonfly amigurumi is a relaxing and rewarding experience that allows you to unleash your creativity and create something truly special. So grab your crochet hook and let your imagination take flight with these enchanting dragonflies!
Materials:
- Worsted Weight (#4) Yarn – Cotton or acrylic yarn will work for this project. You will need about 50 yds (40 yds in the main head/body color, 10 yds in white for the wings). The dragonflies pictured in this pattern were made with WeCrochet/Knit Picks Brava Worsted yarn in the colorways Cornflower, Lady Slipper, and White.
- 3.5 mm crochet hook
- Black embroidery thread (for the mouth)
- Safety eyes – 8mm size
- Stuffing (any fiber-based stuffing like Poly-fil or Fiber Fill)
- Yarn needle to weave in ends (bent yarn needles are the best for amigurumi projects)
- Scissors for cutting yarn
Stitches Used:
- Ch – chain
- Sl St – slip stitch
- SC – single crochet
- SC DEC – single crochet decrease
- INV DEC – invisible single crochet decrease – insert hook into front loop of next stitch, then insert your hook into the front loop of the following stitch (3 loops on hook). Yarn over and draw through 2 loops (2 loops on hook), yarn over and pull through 2 remaining loops on hook.
Finished Size:
When finished, this dragonfly amigurumi measures approximately 5” from bottom of the body to the top of the antennae. The measurement across from wingtip to wingtip is approximately 4.5.”
Gauge:
Gauge is not critical for this pattern to turn out, however, for reference, 2 inches square is approximately 9 rows of 11 SC stitches.
Important Notes:
Magic Circle – Make a circle with your yarn, insert crochet hook into circle, and draw up a loop. Chain one and then start making the stitches of round 1 into the ring. This video tutorial will show you the magic circle and working the first rounds of stitches.
Continuous Rounds – This pattern is worked up in continuous rounds. This means that at the end of each round, you will proceed right to the stitches of the next round without joining. It is handy to have a stitch marker or piece of yarn to help you keep track of the start/end of each round.
The dragonfly body and head are worked up in one piece from the top down. Wings and antennae are worked up separately and sewn on at the end.
Pattern Instructions – Crochet your own Dragonfly Amigurumi!
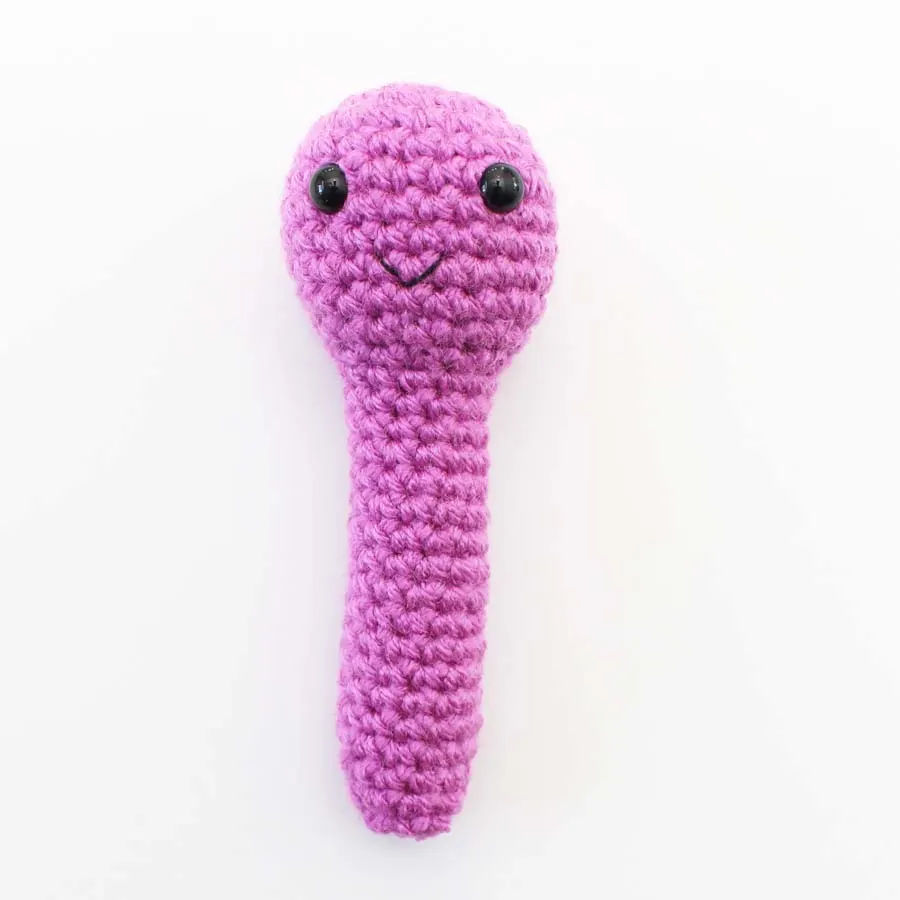
Head and Body
The head/body is worked from the top down.
Round 1: In main color, magic circle, ch 1, 6 SC into ring (6)
Round 2: 2 SC in each stitch around (12)
Round 3: *2 SC in first, SC in next st, repeat from * around (18)
Round 4: *2 SC in first, SC in next 2 sts, repeat from * around (24)
Rounds 5 – 10: SC in each st around (24)
Insert safety eyes between rounds 6 and 7, about 4 stitches apart, centering them in the middle of the face. If you are adding eyelashes, first place the safety eyes where you would like them, but do not secure the back. Take the safety eyes out and use your yarn needle to stitch on the eyelashes first. Then place the safety eyes back in and secure the backs. The mouth can also be sewn on at this point. Use your yarn needle to sew a “v” in the center of the face 2-3 rounds below the eyes.
Start stuffing head and continue to stuff over the next rounds of the body. Be sure to stuff firmly, but not so firmly that stuffing is visible between the stitches.
Round 11: *INV DEC, SC next 2 sts, repeat from * around (18)
Round 12: *INV DEC, SC next st, repeat from * around (12)
Rounds 13 – 27: SC in each st around (12)
Round 28: *INV DEC, SC next 4 sts, repeat from * around (10)
Be sure to add enough stuffing before the opening gets too small.
Round 29: *INV DEC, SC next 3 sts, repeat from * around (8)
Round 30: *INV DEC, SC next 2 sts, repeat from * around (6)
Fasten off, weave in ends.
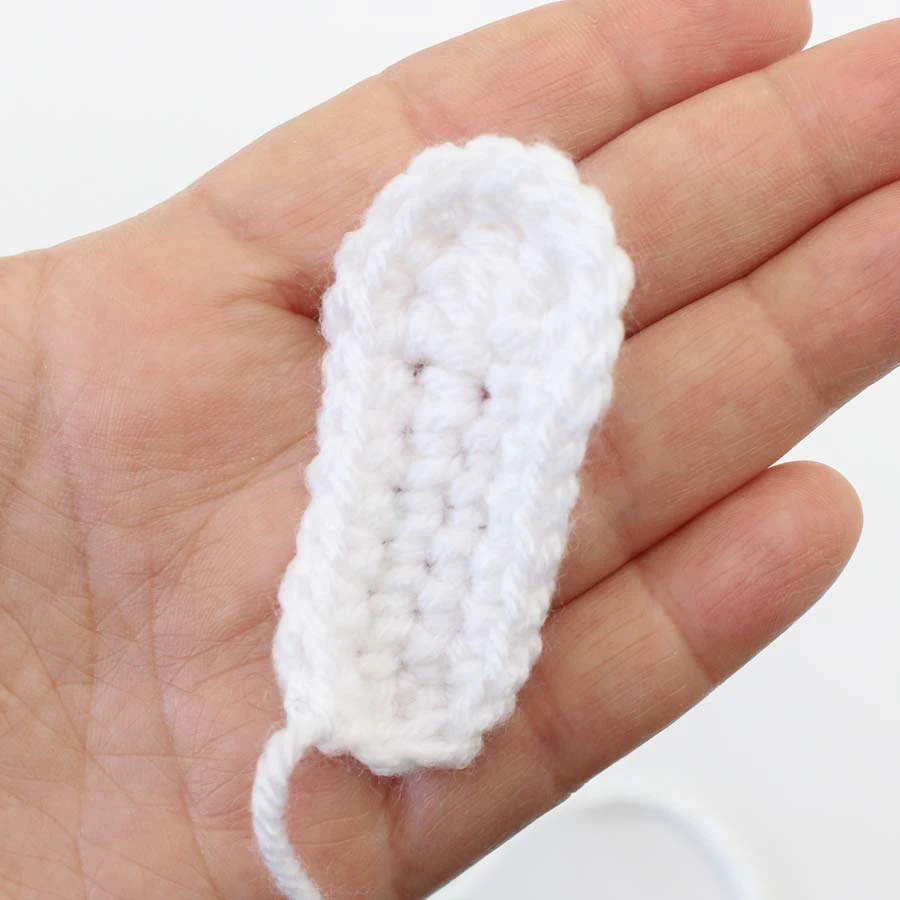
Wings (make 4)
Round 1: In white, ch 9, SC in 2nd ch from hook, SC in next 6 sts, 5 DC in last st. Continue around so you are working on the other side of the chain. SC next 7 sts (last SC will be at the starting end of the chain in the same stitch as your first SC). (19)
Round 2: SC in first 7 sts, 2 SC in each of the next 5 sts, SC last 7 sts (24)
Fasten off. Leave a long enough tail to sew onto body.
Antennae (make 2)
Round 1: In main color, magic circle, ch 1, 4 SC into ring (4)
Round 2: *2 SC in first, SC in next st, repeat from * around (6)
Round 3: 2 SC in each stitch around (6)
Round 3: SC DEC, SC in next st, repeat from * around (4)
Fasten off. Leave a long enough tail to sew onto head.
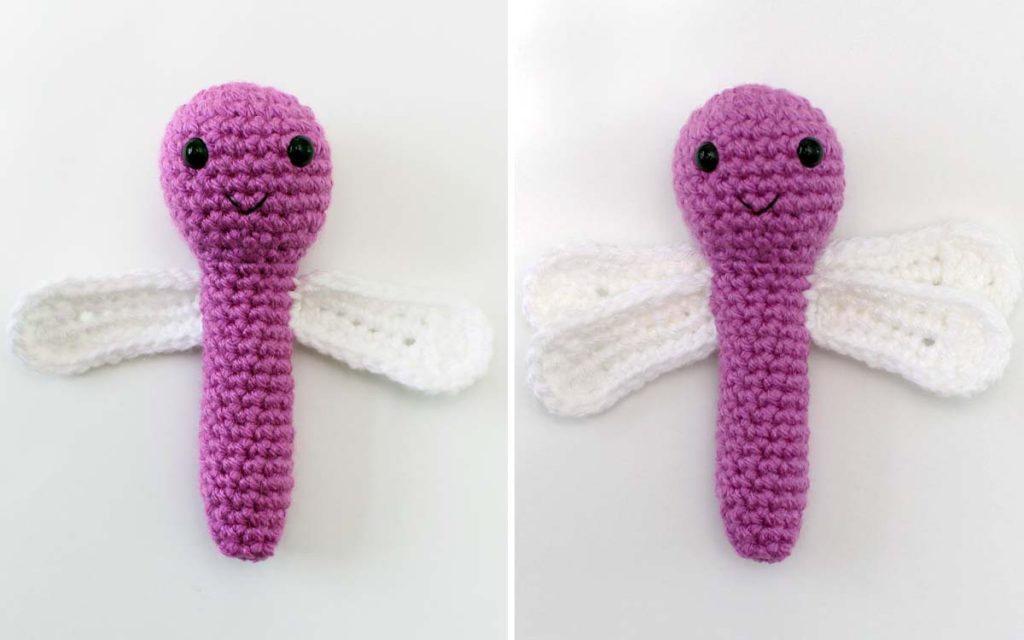
Dragonfly Assembly Instructions
Step 1: Sew the wings to the dragonfly’s body. The wings will be layered, with the front set of wings a little lower than the back set. Sew the lower set of wings onto the sides of the body, one on each side, in the first four rounds directly below the head. Sew this set of wings so they angle downward slightly. When wings are secure, pass ends through body to weave in and cut the ends.
Next, sew the upper set of wings to the body starting two rounds higher than the first set of wings and behind them so they are overlapping a little bit. Sew on this set of wings in the same way as the lower set, except that for some of the stitches, you will also be passing through both layers of wings. Once the wings are secured to the body, add a few stitches along the wing to partially attach the wings together. This will also help keep the height of their overlap and make them sturdier. Weave in ends and cut yarn.
Step 2: Sew the antennae to the dragonfly’s head. Place one antenna on top of the head, a couple rounds to the side of the center, lining up with one of the eyes. Sew around the stitches at the bottom of the antennae, passing through stitches on the head to secure it in place. Weave in ends by passing through the head and then cut yarn. Repeat for second antenna.