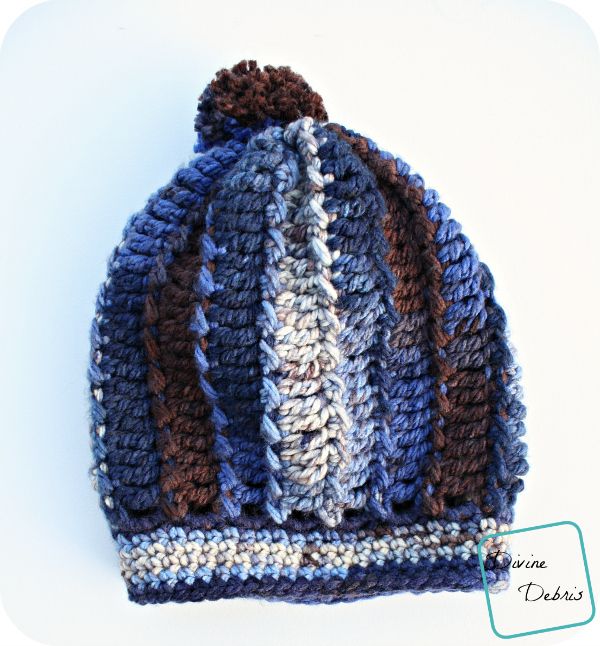
Crochet Bulky Yarn Hat
Crochet Bulky Yarn Hats are the perfect combination of coziness and style! Using chunky yarn adds a lovely texture, making the hat warm and squishy. The best part is that they work up quickly, so you can create a new winter accessory in no time. Whether you're a beginner or a seasoned crocheter, crafting a bulky yarn hat is a fun and rewarding project. Plus, you can customize it with your favorite colors and embellishments to make it uniquely yours. Get ready to stay warm and chic with your handmade crochet bulky yarn hat!
Materials:
- US K (6.50 mm) Crochet Hook
- Size #5/ Bulky Yarn
- 5.2 0z/ 161 yards
- I used Loops and Threads Charisma in Lakeside
- Needle to sew ends
Gauge:
12 dcs x 6 rows = 4.25″ 4.25″
Terms/ stitches used
- RS: Right Side
- St: Stitch
- Ch: Chain
- Slip st: Slip Stitch
- Sc: Single Crochet
- Hdc: Half Double Crochet
- Tr: Treble Crochet
Notes:
- This hat is worked in two parts. The first is the main body which is worked flat, with rows worked back and forth and a turn at the beginning (or end) of the row. You secure the first row to the last to create a tunnel. Then you cinch the open end (opposite the brim) closed. The second is the brim, which is worked on one end of tunnel.
- The right side is the side that the back of the hdc/ slip st row and tr front are facing out.
- You can make the rows as long as you want, just make sure it’s an even amount. Just chain an odd amount + 4 for your first row.
Finished measurements (for pattern as written):
Height: 11″
Width: 9″(brim) – 10.25″
Pattern instructions:
Row 1:(RS) Ch 27, tr into the 5th ch from the hook and across – 24 trs
Row 2: Ch 1, turn, slip st into the first st, hdc into the next st, *slip st into the next st, hdc into the next st,* repeat from * to * 10 more times – 12 hdcs
Row 3: Ch 4 (counts as a tr here and throughout), turn, tr into the next 23 sts – 24 trs
Row 4: Ch 1, turn, slip st into the first st, hdc into the next st, *slip st into the next st, hdc into the next st,* repeat from * to * 10 more times – 12 hdcs
Rows 5 – 32: repeat rows 3 – 4
Fasten off leaving a piece of yarn that is longer than a row. Use this piece of yarn to secure row 1 to row 32 with your preferred method of joining.
Now that you have a tunnel, cinch one end closed by weaving a piece of yarn and your needle back and forth on the tr rows, do this all the way around. Once you reach the place where you began, pull the pieces of yarn opposite each other to close the hole. Weave your ends in to secure the hole closed.
Brim:
Row 1: Opposite the closed end, start in any tr (do it close to seam from Row 1/32 that way you only have one seam place), sc 3 times into each tr edge all the way around, slip st into the first sc to secure – 48 scs
Rows 2 – 5: Ch 1, sc into the same st as join and into the next 47 sts, slip st into the first st to secure – 48 scs
Fasten off. Weave in your ends.
Note: Due to the lack of stretch in the bulky yarn, try on the hat before you fasten off, you may need to do 4 scs into the edge of trs (or a mixture of the two, maybe). Mine was a bit tight, not uncomfortably so, just tighter than I usually prefer and had I done 4 scs and not 3 it would have been perfect. (making the stitch count 64 scs)