

Make Your Own Crochet Basket — Fast Bulky-Yarn Pattern in 3 Sizes
Make a practical, attractive crochet basket using bulky yarn and only basic stitches. This quick project is ideal for an advanced-beginner crocheter who wants a useful finished piece to store small items, organize a shelf, or gift to someone special. The pattern includes three sizes (small, medium, large), instructions for an invisible/no-cut join, and optional finishing choices including a leather tag or a built-in handle.
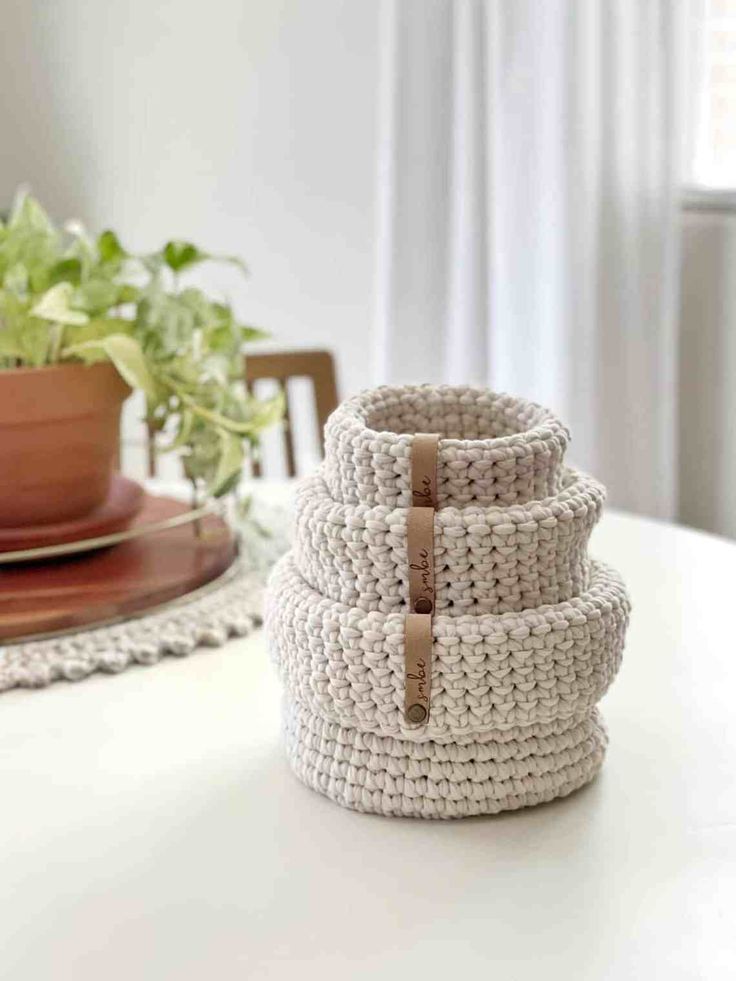
Caption: Finished basic crochet basket made with two strands of bulky yarn; sides may be folded down for a different look.
Skill Level
Advanced Beginner
Stitch Key | US Terms
- ch(s) – chain/chains
- beg – beginning
- blo – back loop only
- hdc – half double crochet
- rnd(s) – round/rounds
- sc – single crochet
- sl st – slip stitch
- st(s) – stitch/stitches
Materials
- Size 5, bulky yarn (8.8oz/250g (317yds/290m)), two strands held together
- Approximately 125 yards for size small, 200 yards for size medium, & 275 yards for size large
- L11/8mm Crochet Hook (or size to meet gauge)
- Tapestry Needle
- Scissors
- Flexible Measuring Tape
- Optional Logo or Leather Tags
Gauge | Working In The Round
First 3 Rounds in Pattern = 4 ¼ Inches with L Hook. Please check your gauge before starting, as tension varies between crocheters and yarns.
Special Stitches
No-Cut Join Method
Instead of joining the end of a round with a slip stitch, remove hook from loop. Insert hook from back to front under both bars of first stitch of round. Put loop back onto hook and draw through to the back. Pull loop tightly to draw stitches together, then pull working yarn to draw loop back to usual size.
Invisible Join
After completion of the last stitch of the round, fasten off. With a tapestry needle, weave tail end under both loops of the first stitch of the round. Next, weave through the back loop only of the last stitch of the round. Weave in tail.
Notes
- Work the pattern holding TWO strands of yarn together.
- Beginning ch/chs of each rnd does NOT count as 1st st; work 1st st in same st as beg ch/chs.
- The height shown throughout the pattern is before the sides of the basket are folded down.
Bottom – Follow For ALL Sizes
Rnd 1. Create a magic circle, ch1, work 10 hdc in circle, join with sl st. (10 hdc)
Alternate Method: Ch4, join with sl st in 4th ch from hook, ch1, work 10 hdc in circle, join with sl st. (10 hdc)
Rnd 2. Ch1, 2 hdc in each st around, join with sl st. (20 hdc)
Size Small Continued
Rnd 3. Ch1, *hdc in next st, 2 hdc in next st, repeat from * around, join with sl st. (30 hdc) (diameter should measure about 4 ¼” across)
Alternate Join Method: join using the no-cut join method (special instructions above), this will create a less noticeable seam.
Starting Sides
Rnd 4. Ch1, working in blo, sc in each st around, sl st in beg sc to join. (30 sc)
Rnd 5-16. Ch1, continue working in BOTH loops, sc in each st around, sl st in beg sc to join. (30 sc)
See finishing instructions below.
Size Medium Continued
Rnd 3. Ch1, *hdc in next st, 2 hdc in next st, repeat from * around, join with sl st. (30 hdc) (diameter should measure about 4 ¼” across)
Rnd 4. Ch1, *hdc in next 2 sts, 2 hdc in next st, repeat from * around, join with sl st. (40 hdc) (diameter should measure about 5 ½” across)
Alternate Join Method: join using the no-cut join method (special instructions above), this will create a less noticeable seam.
Starting Sides
Rnd 5. Ch1, working in blo, sc in each st around, sl st in beg sc to join. (40 sc)
Rnd 6-19. Ch1, continue working in BOTH loops, sc in each st around, sl st in beg sc to join. (40 sc)
See finishing instructions below.
Size Large Continued
Rnd 3. Ch1, *hdc in next st, 2 hdc in next st, repeat from * around, join with sl st. (30 hdc) (diameter should measure about 4 ¼” across)
Rnd 4. Ch1, *hdc in next 2 sts, 2 hdc in next st, repeat from * around, join with sl st. (40 hdc) (diameter should measure about 5 ½” across)
Rnd 5. Ch1, *hdc in next 3 sts, 2 hdc in next st, repeat from * around, join with sl st. (50 hdc) (diameter should measure about 7” across)
Alternate Join Method: join using the no-cut join method (special instructions above), this will create a less noticeable seam.
Starting Sides
Rnd 6. Ch1, working in blo, sc in each st around, sl st in beg sc to join. (50 sc)
Rnd 7-22. Ch1, continue working in BOTH loops, sc in each st around, sl st in beg sc to join. (50 sc)
See finishing instructions below.
Finishing Off – Follow For ALL Sizes
To finish off your basket, you have the option to use a leather tag, no tag, or crochet a handle.
For Leather Tag – Or No Tag
Ch1, continue working in BOTH loops, sc in each st around, finish off using the invisible join method.
Attach leather tag where desired. See pictures for tag placement. If hanging, attach the tag at the seam about two rounds down.
For Built-In Crocheted Handle – All Sizes
Starting where you left off from previous rnd, ch10 (or desired amount for shorter or longer handle), working in BOTH loops, sc in same st as ch10 and remaining sts around, do NOT join.
Sl st in each ch that forms the handle, sl st in beg sc, fasten off & weave in loose ends.
Your baskets are complete — enjoy your finished storage baskets!